
VIRTUAL CINEMATOGRAPHY: THE EMBODIED CAMERA
All Contents Created by and Copyright CK Olsen. All Rights Reserved.
ABSTRACT: The Embodied Camera is an analog exercise deployed within my Virtual Cinematography course, designed for students to explore and enact key virtual/CGI camera concepts through playful real world activities.
CCS CONCEPTS: Computing methodologies → Animation; Rendering; Image manipulation; Graphics systems and interfaces; Virtual reality.
KEYWORDS: Virtual Cinematography, Camera, CGI, Animation
OVERVIEW: This analog exercise enables students to analyze, demonstrate, and explore key virtual camera functions through real-world enactments of key photographic mechanisms. This exercise includes a variety of customizable activities, each designed to assist students in understanding specific underlying mechanics of photography, which when choreographed together, enable refined control of the final look of a rendered output image. The activities are designed to function inside a roughly 10‘ Wide x 10’ Deep x 8’ High volume set within a classroom, gymnasium, or shooting stage, and if desired, can be mirrored within a CGI environment at a similar scale to duplicate the real world activities within the virtual realm. The goal of these exercises is for students to physically enact key camera properties and photographic components (Incl. Camera and Interest Position, Lens selection, Gate/Sensor size, Lighting placements/Intensity, etc.), so they can better understand how their individual roles and choices contribute to the final Field of View, Framing, Composition, Focus, Depth, Exposure, and Choreography of a shot. Over the course of this exercise, students will: explore the relationships between Camera Position, Interest, Object Center and Field of View to enact “Framing”; examine the interplay between Camera/Subject Distance and lens choices to enact “Focus”; compare the individual contributions Iris, Shutter, and Light Intensity have upon the concept of “Exposure”; and, evaluate strategies for developing intentional “Choreography” for both Camera and Interest, through Timing, Location, and Path-related Keyframe activities enacted within the volume.
RECOMMENDED MATERIALS: Painters Tape, String or Yarn; Tape Measure; Cardboard “FRAME” (sample file available below); Scissors or Xacto knife; Metronome or stopwatch; Spreadsheet/Whiteboard for evaluating mathematic formulas and recording key placement/choreographic information.
| Summary | This exercise enables students to analyze, demonstrate, and ultimately, enact key camera functions through embodied proxies to better understand the interplay of various camera processes, and their impact upon both real world, and virtually rendered output images. |
| Learning Outcomes | Students will examine relationships between Camera/Subject locality, Field of View and Framing; compare results of interplay between Iris, Shutter, and Light; and evaluate strategies for Timing and Keyframe placements to develop intentional camera choreography. |
| Classifications | Animation; Fundamentals; Mixed/Aug. Reality; Perception; Virtual Reality; Image Manipulation; Rendering; Visualization |
| Audience | This exercise is ideal for CGI Artist/Animators of all levels looking to enhance their virtual cinematography skills. |
| Dependencies | Students must have introductory CGI Modelling, and/or Animation experience, including keyframing, lighting, and rendering within a CGI software environment. |
| Prerequisites | This exercise begins my Virtual Cinematography course, introducing key concepts which are further explored as the course proceeds. |
| Strengths | This playful exercise fosters interpersonal connectivity and teamwork, and its inherent tactility engenders a non-traditional kinesthetic method of examining techniques commonly explored only via mouse, keyboard and screen. |
| Weaknesses | This exercise benefits from gregarious volunteers to jumpstart core activities, but students who don’t choose to initially participate still benefit by witnessing the activity’s events unfold, and often join subsequent iterations after the first wave of volunteers. |
| Variants | Small-scale tabletop models, and/or virtual environments can be additionally employed for a different experience. |
| Assessment | This activity is not directly assessed, but these techniques will be employed and assessed within later assignments and rubrics born of this source material. |
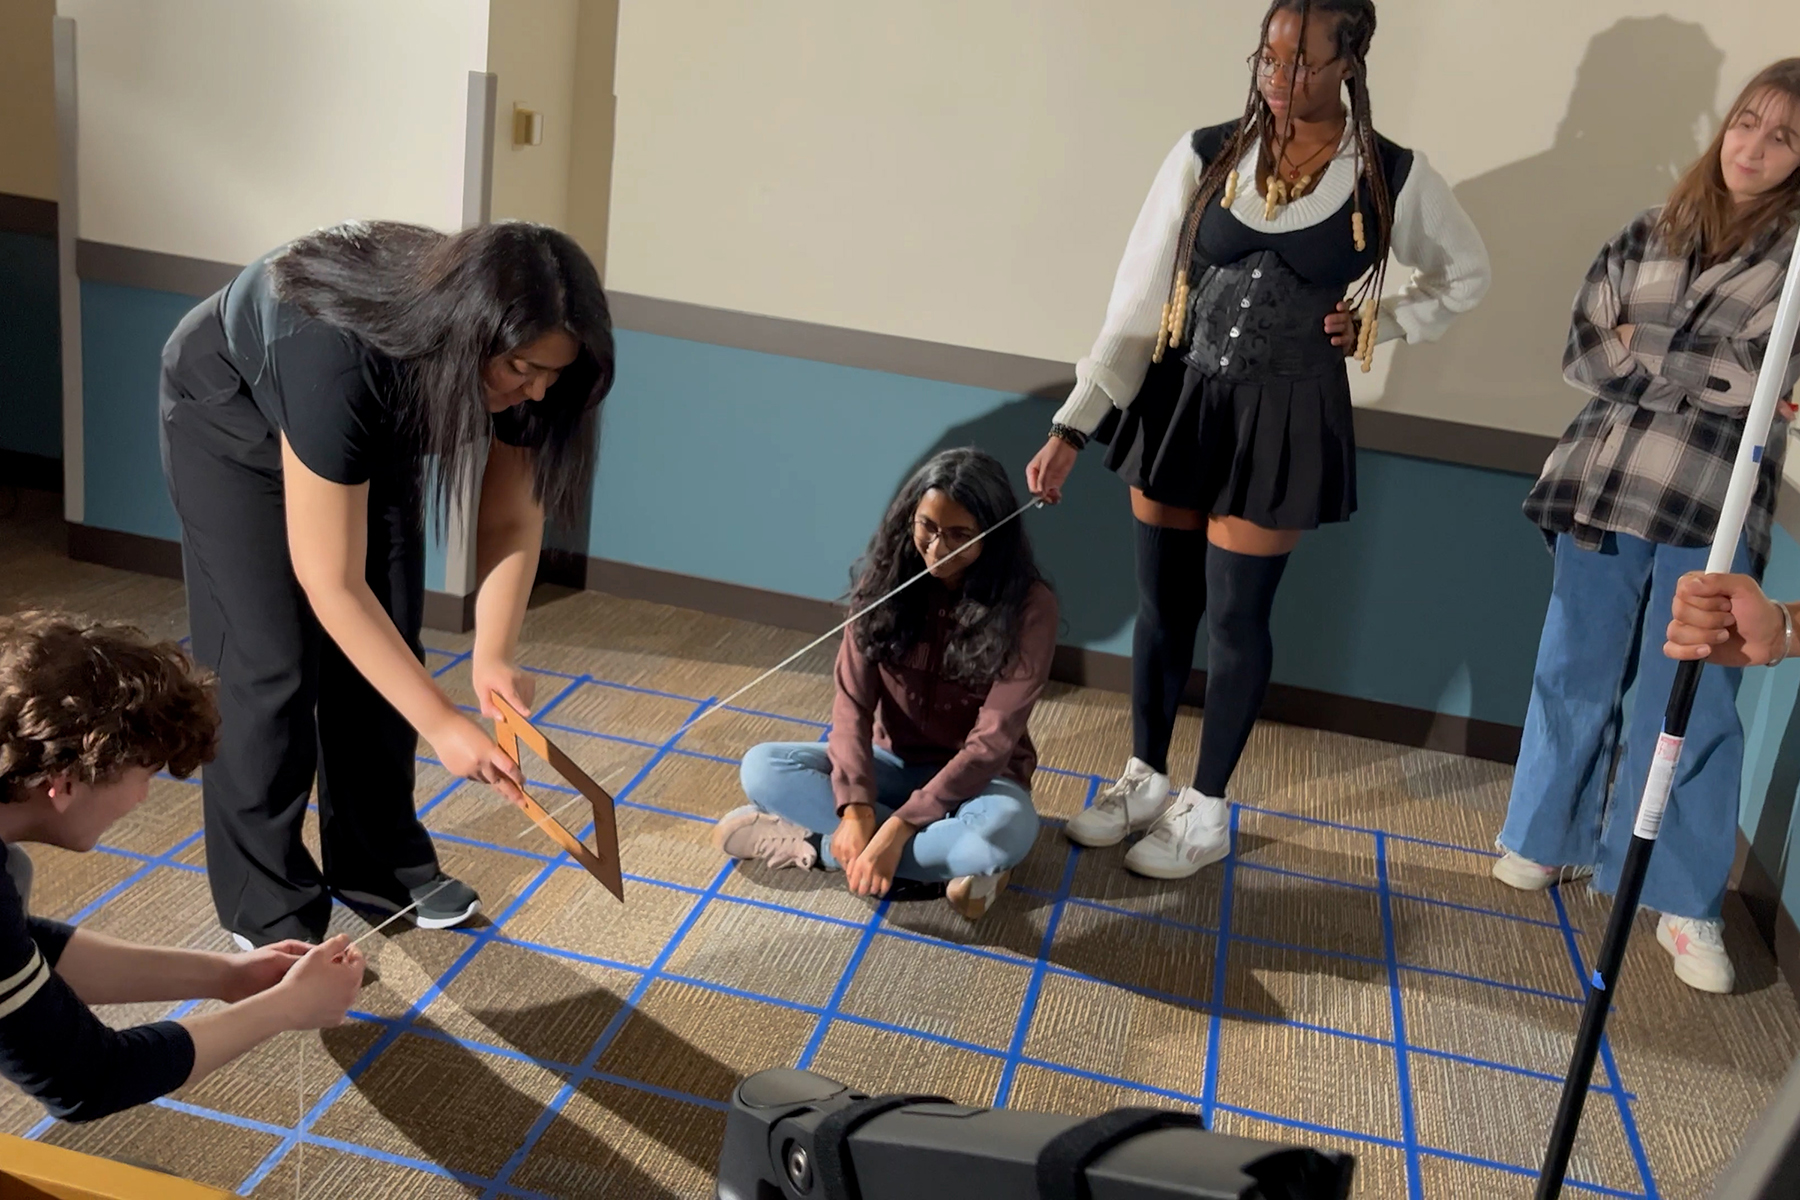
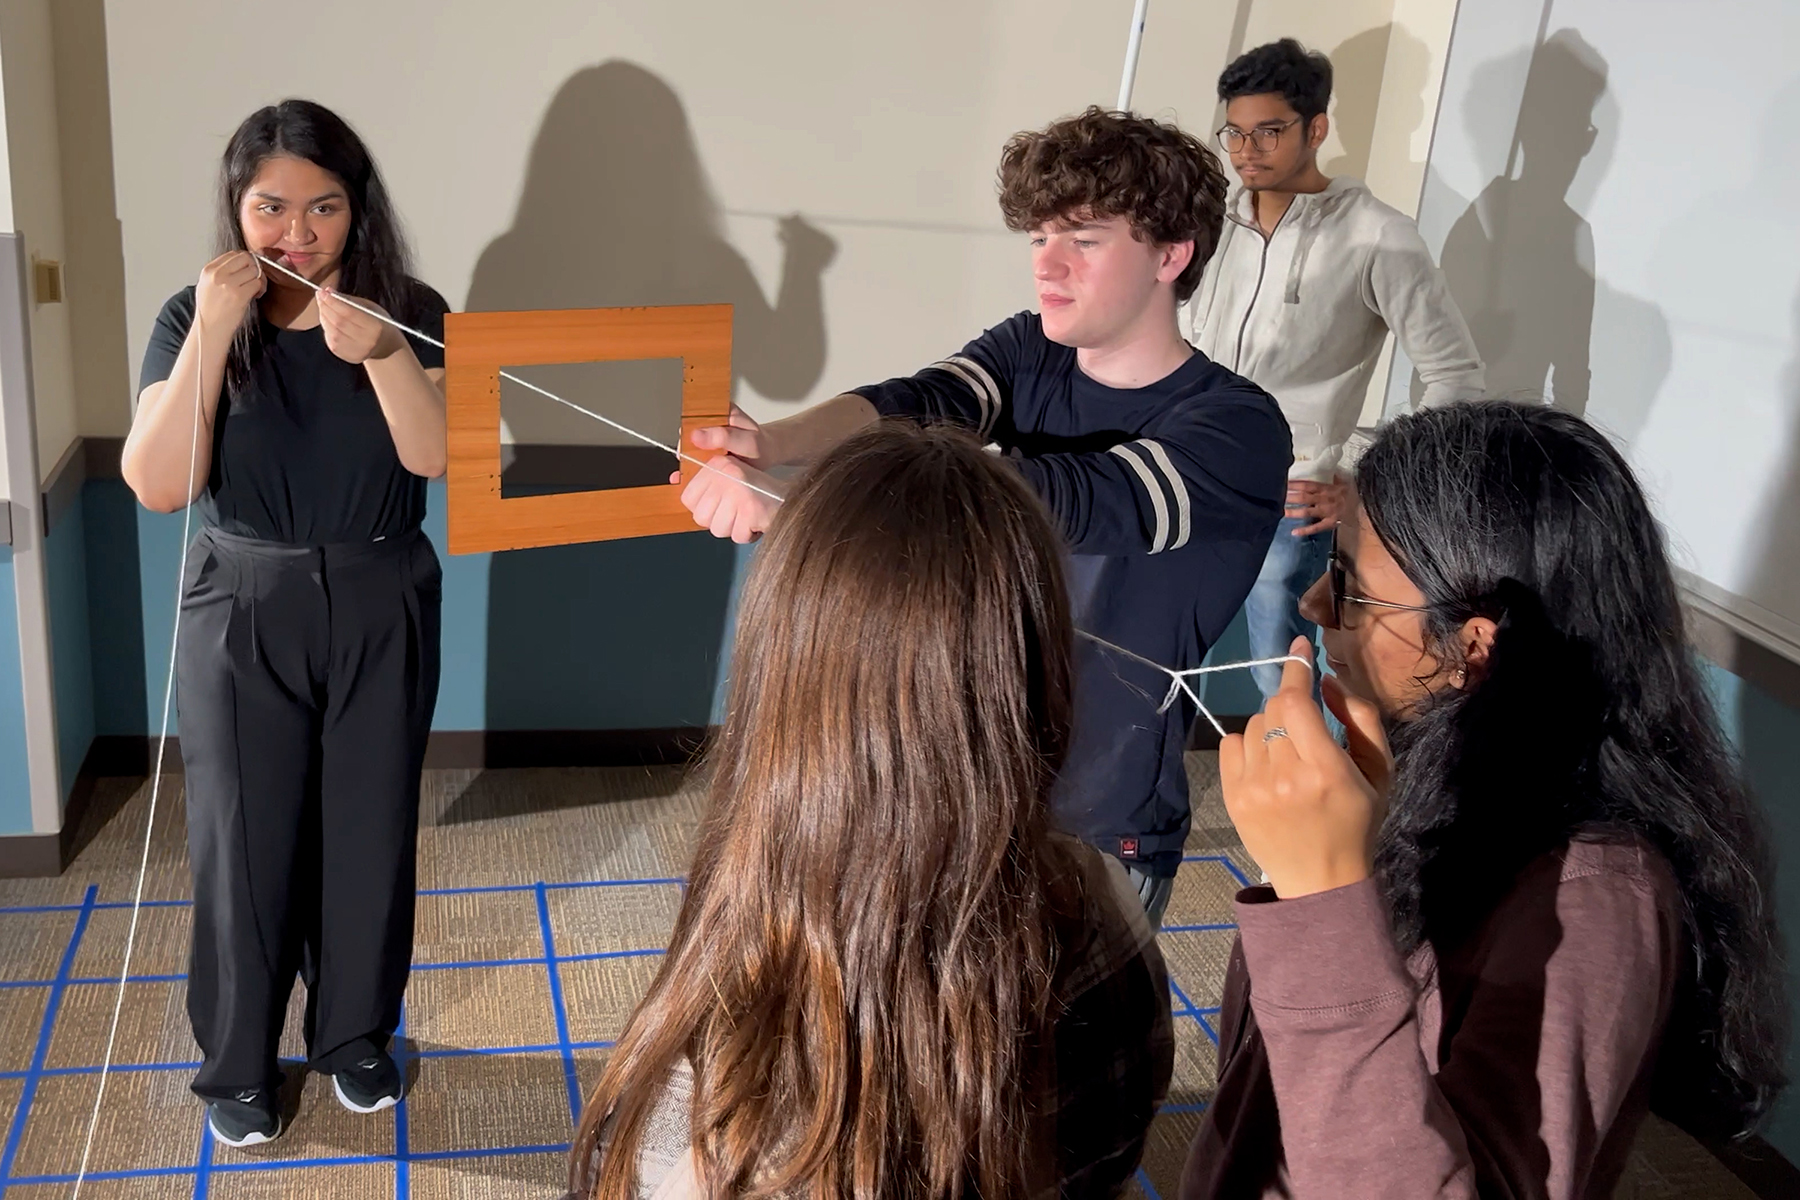
SETUP: Student volunteers begin by creating a roughly 10′ x 10′ grid upon the floor using painters tape. Once complete, assign each of four student volunteers a role as part of a simplified cinematic framing construct, including SUBJECT, CAMERA (Position), FRAME, and (Camera) INTEREST, and begin engaging in the following Embodied Camera activities:
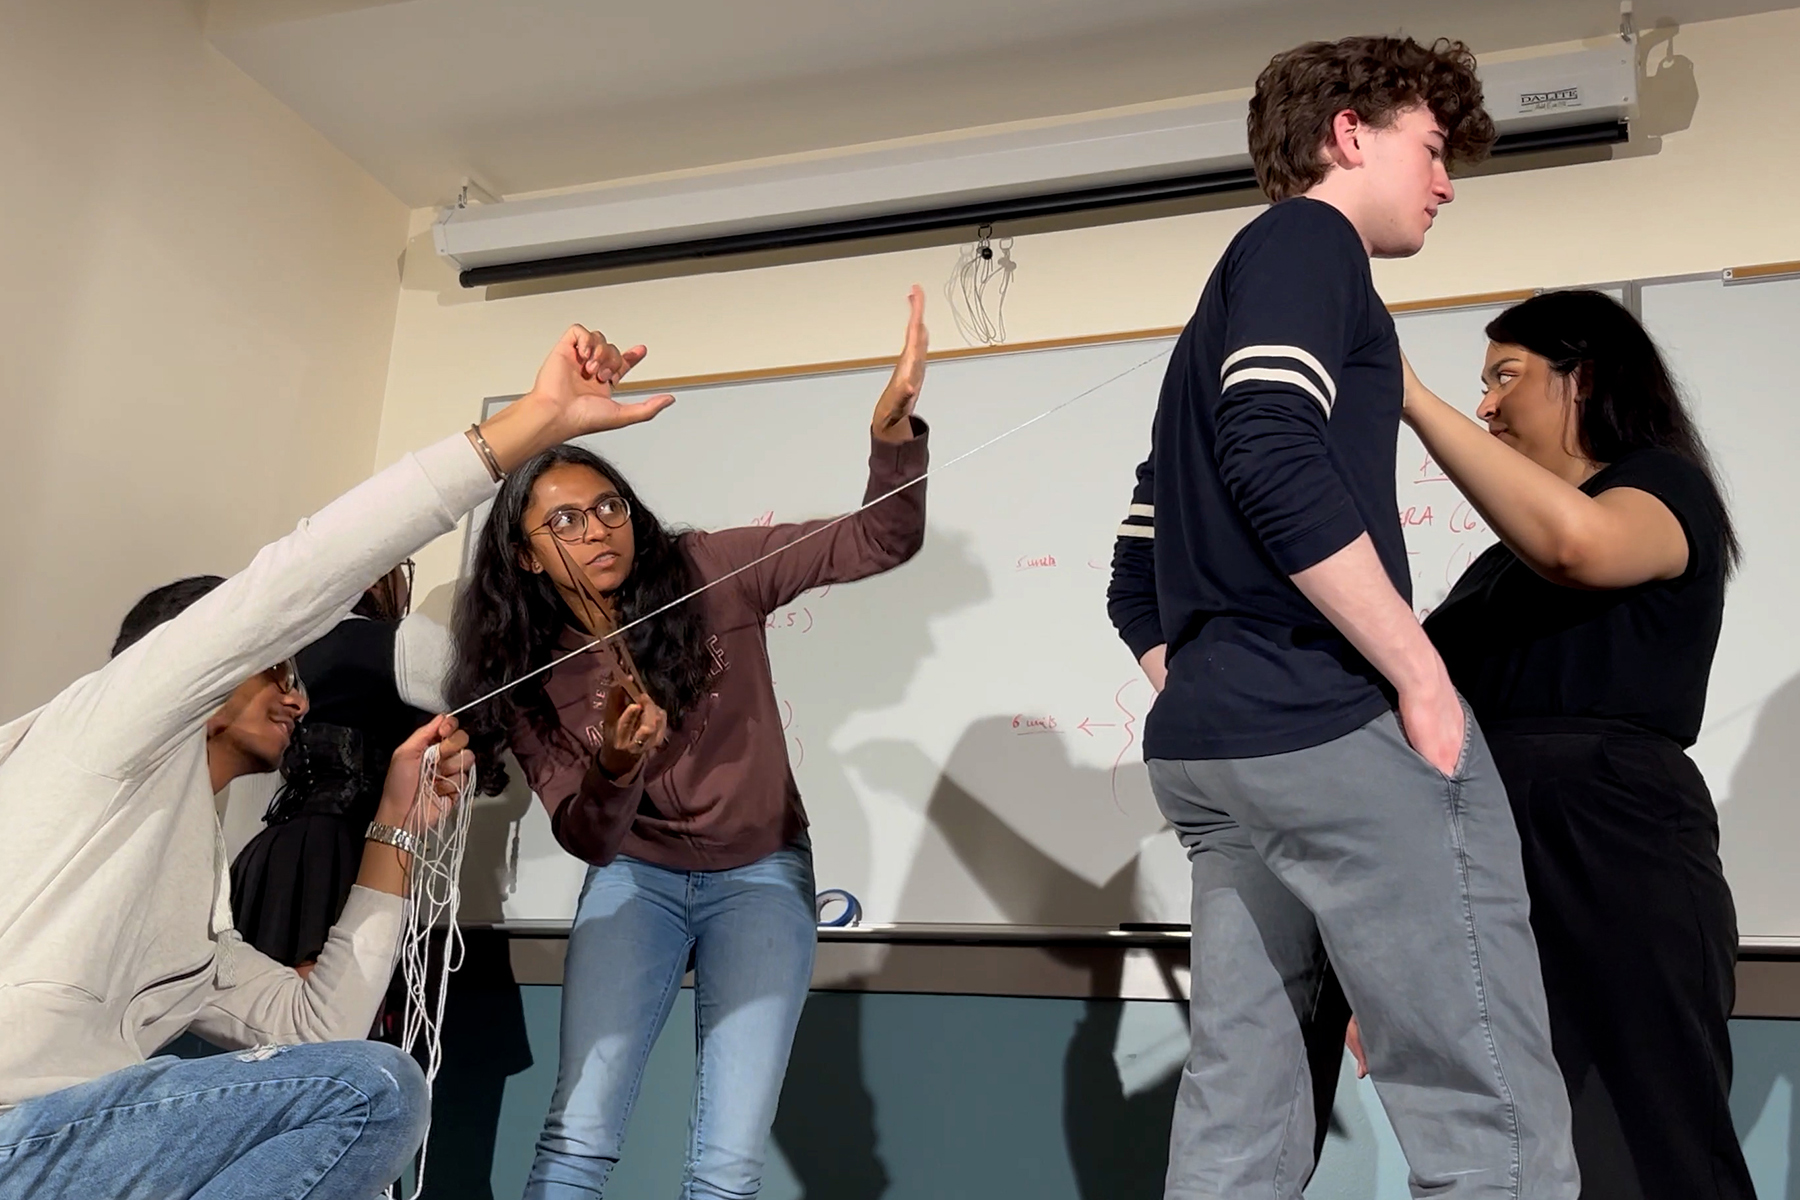
CAMERA/INTEREST: Begin by having SUBJECT stand within the gridded square. Next, have CAMERA and INTEREST each hold a taut string from Camera’s Eyeline to the desired point of interest upon the subject, to show Camera/Interest relationship.
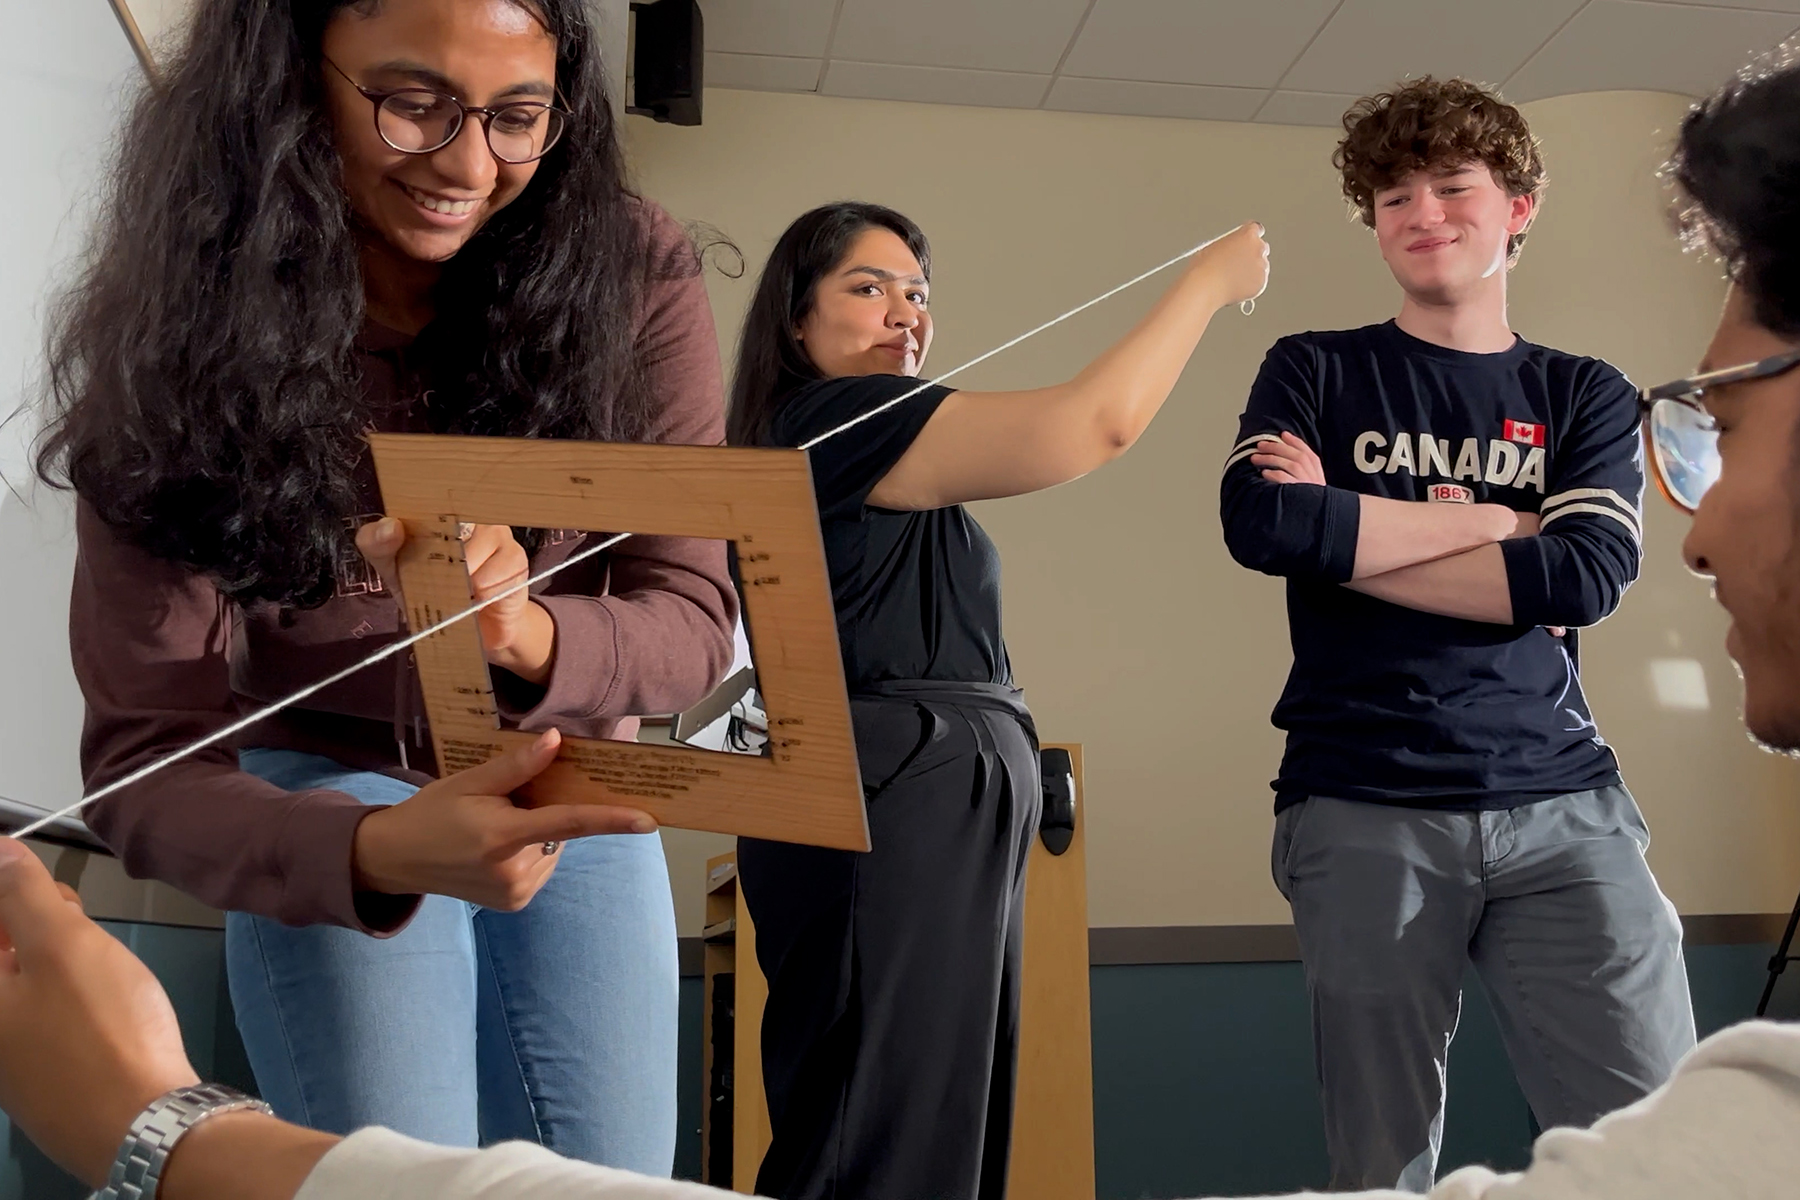
FOV: Introduce fourth student (FRAME) holding an exemplar cardboard frame along the string (Sample Template here), to showcase concepts regarding Field Of View. Have CAMERA instruct FRAME to move their cardboard frame closer or farther away from SUBJECT along the CAMERA/INTEREST connection (the taut string) to replicate the effects of a zoom lens. Take distance and FOV angle measurements to explore lens properties, long & short lenses and zooms, as well as various combos of sensor/gate that enact Aspect Ratio.
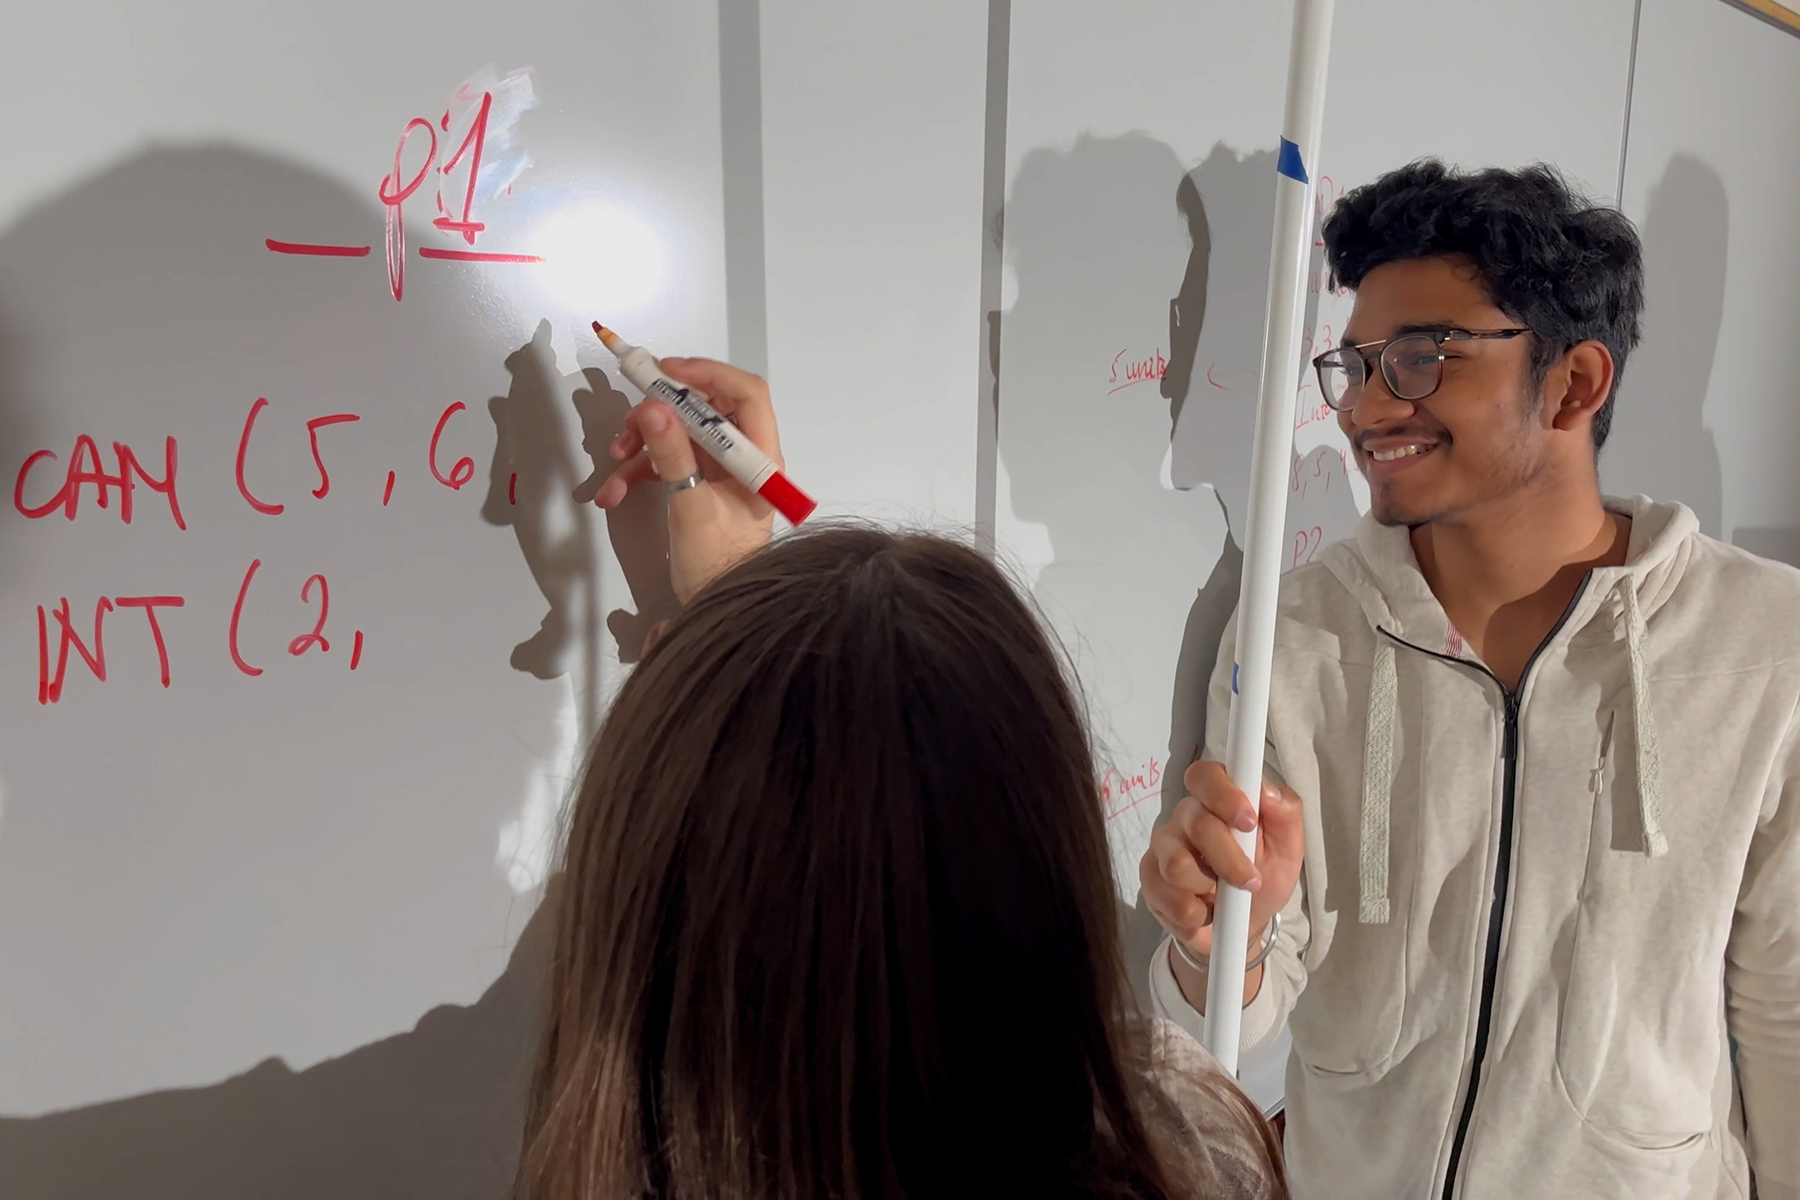
–FOCUS: Once a desired camera framing has been chosen, use a tape measure to gather positional data for CAMERA and INTEREST (the starting and ending point if the STRING vector) and have students calculate the 3D distance between camera and subject. Now begin exploring the relationships between this DISTANCE and FOCAL PLANES. (This provides an opportunity to add in and explore additional Camera Concepts, such as IRIS, SHUTTER and *EXPOSURE!)
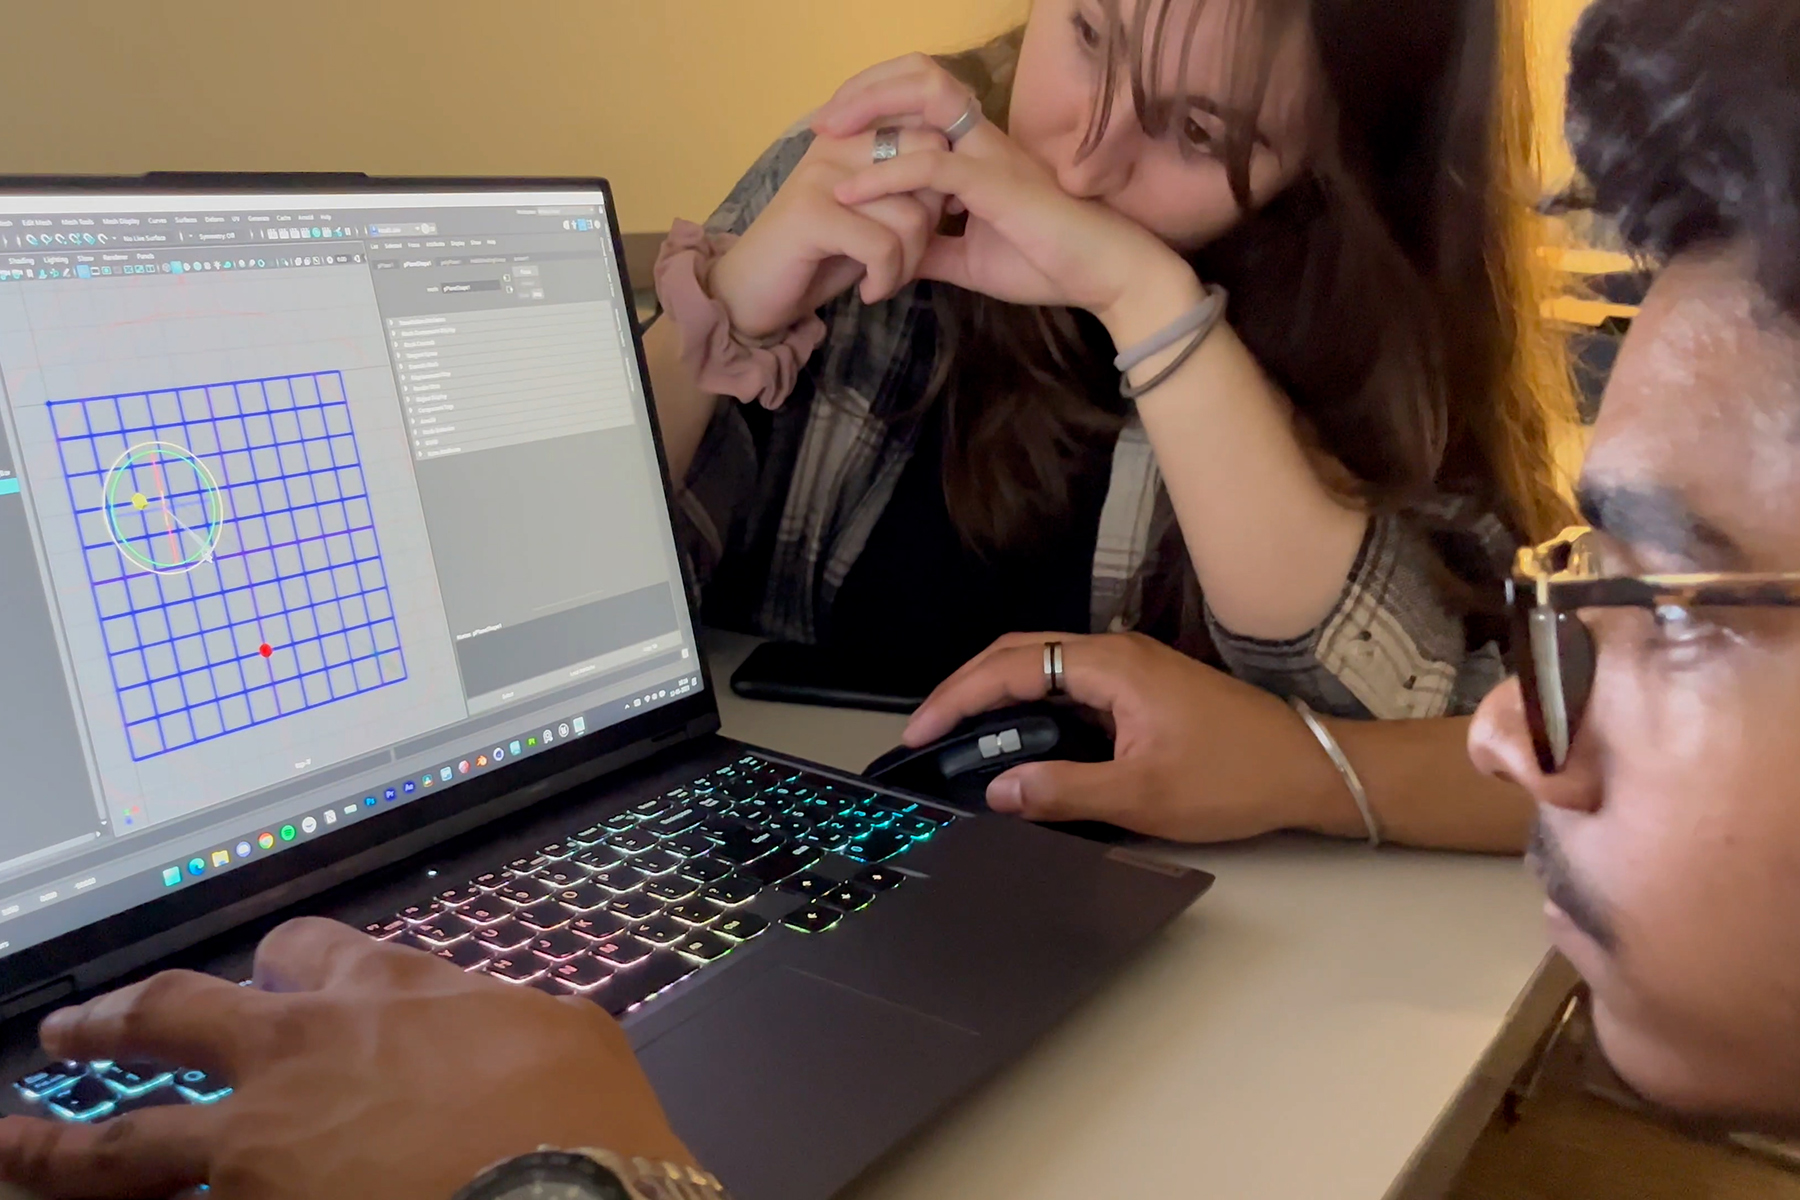
–CAMERA CHOREOGRAPHY:As different framings are explored, add in more students to record the various SUBJECT, CAMERA and INTEREST positions, as well as the FRAME location, assigning these as discrete Keyframed placements within an overall time scale. For example, if each second represented a single frame duration, have each of the active ROLES attempt to move from their keyframe positions “A” to keyframe positions “B” over the course of 24 seconds. This is often inelegant, and can end up in Twister-like results, but that is part of the fun! Add more complexity, and develop a chroegoraphy, set to a student METRONOME who counts off each FRAME, once per second. After each of these activations, students should discuss, reflect and refine. Once several successful transitions have occurred, consider having the students use their real world measurements to recreate their results within a CGI environment.
-*Additional EXPOSURE related activities that enable engaging discussions on the push and pull of Lighting, Iris, and Shutter may be added here at a later time.